MDP.AspNetCore.Authentication.Line
MDP.AspNetCore.Authentication.Line擴充ASP.NET Core既有的身分驗證,加入Line身分驗證功能。開發人員可以透過Config設定,掛載在專案裡使用的Line身分驗證,用以驗證Line帳號登入的使用者。
模組使用
申請服務
MDP.AspNetCore.Authentication.Line使用Line官方提供的OAuth服務來進行身分驗證,依照下列操作步驟,即可申請官方所提供的OAuth服務。
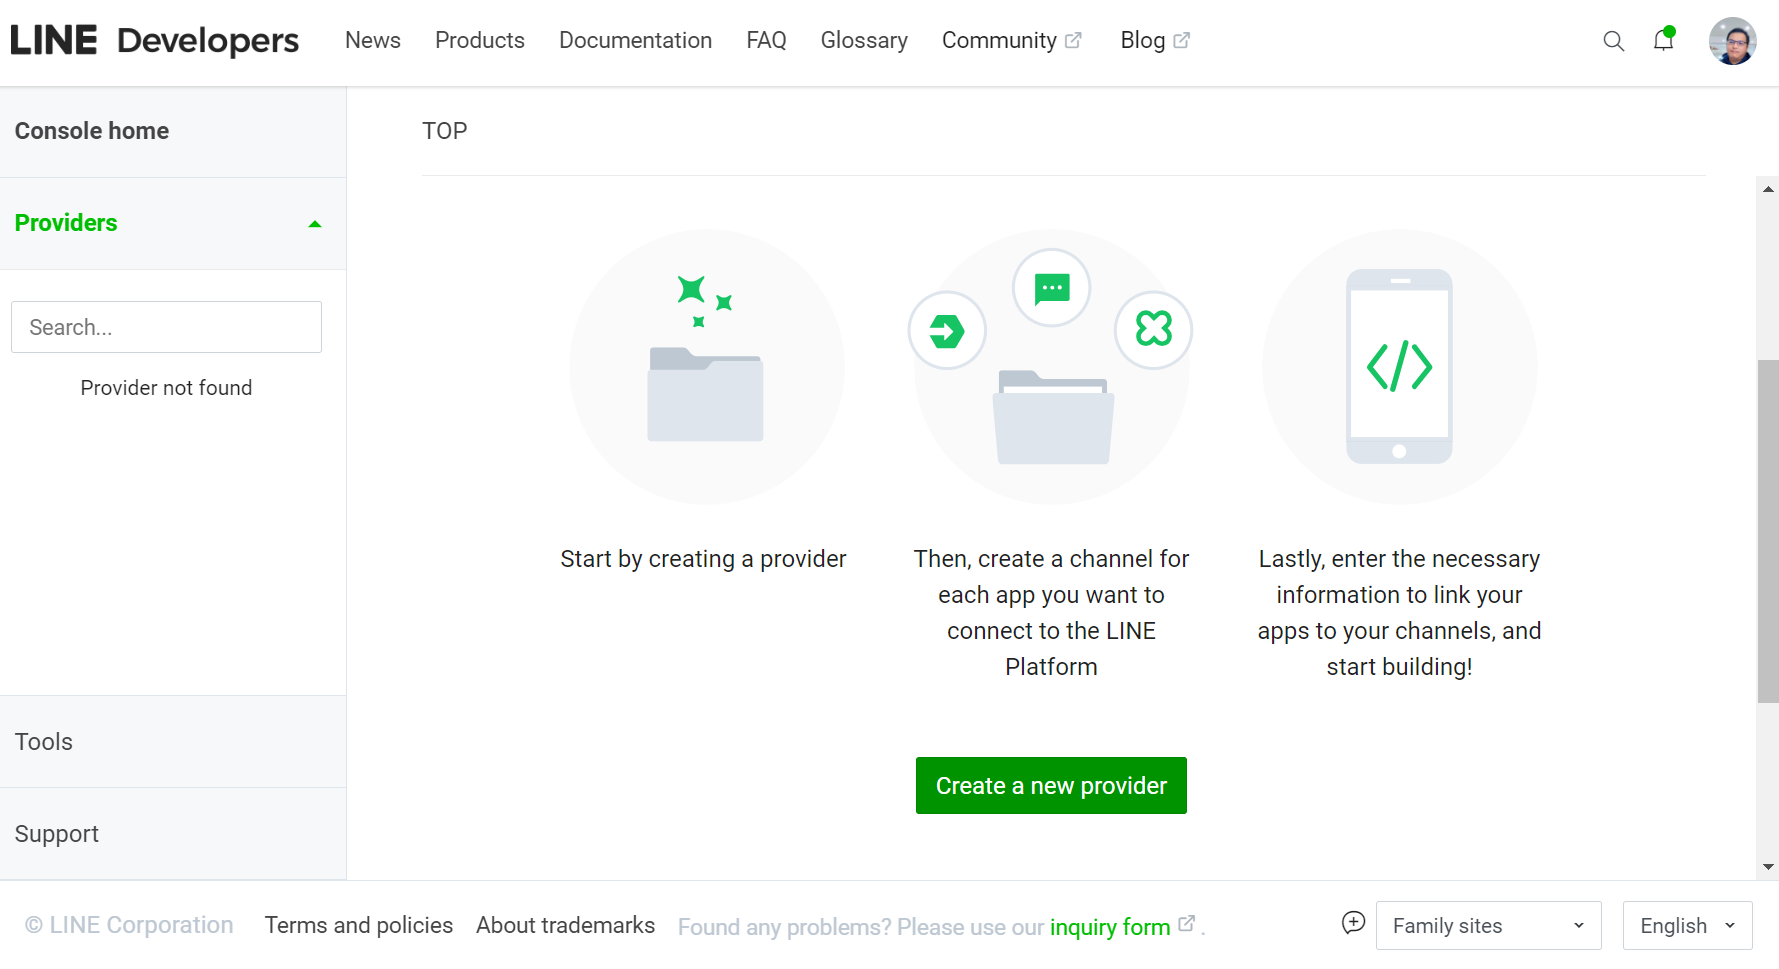
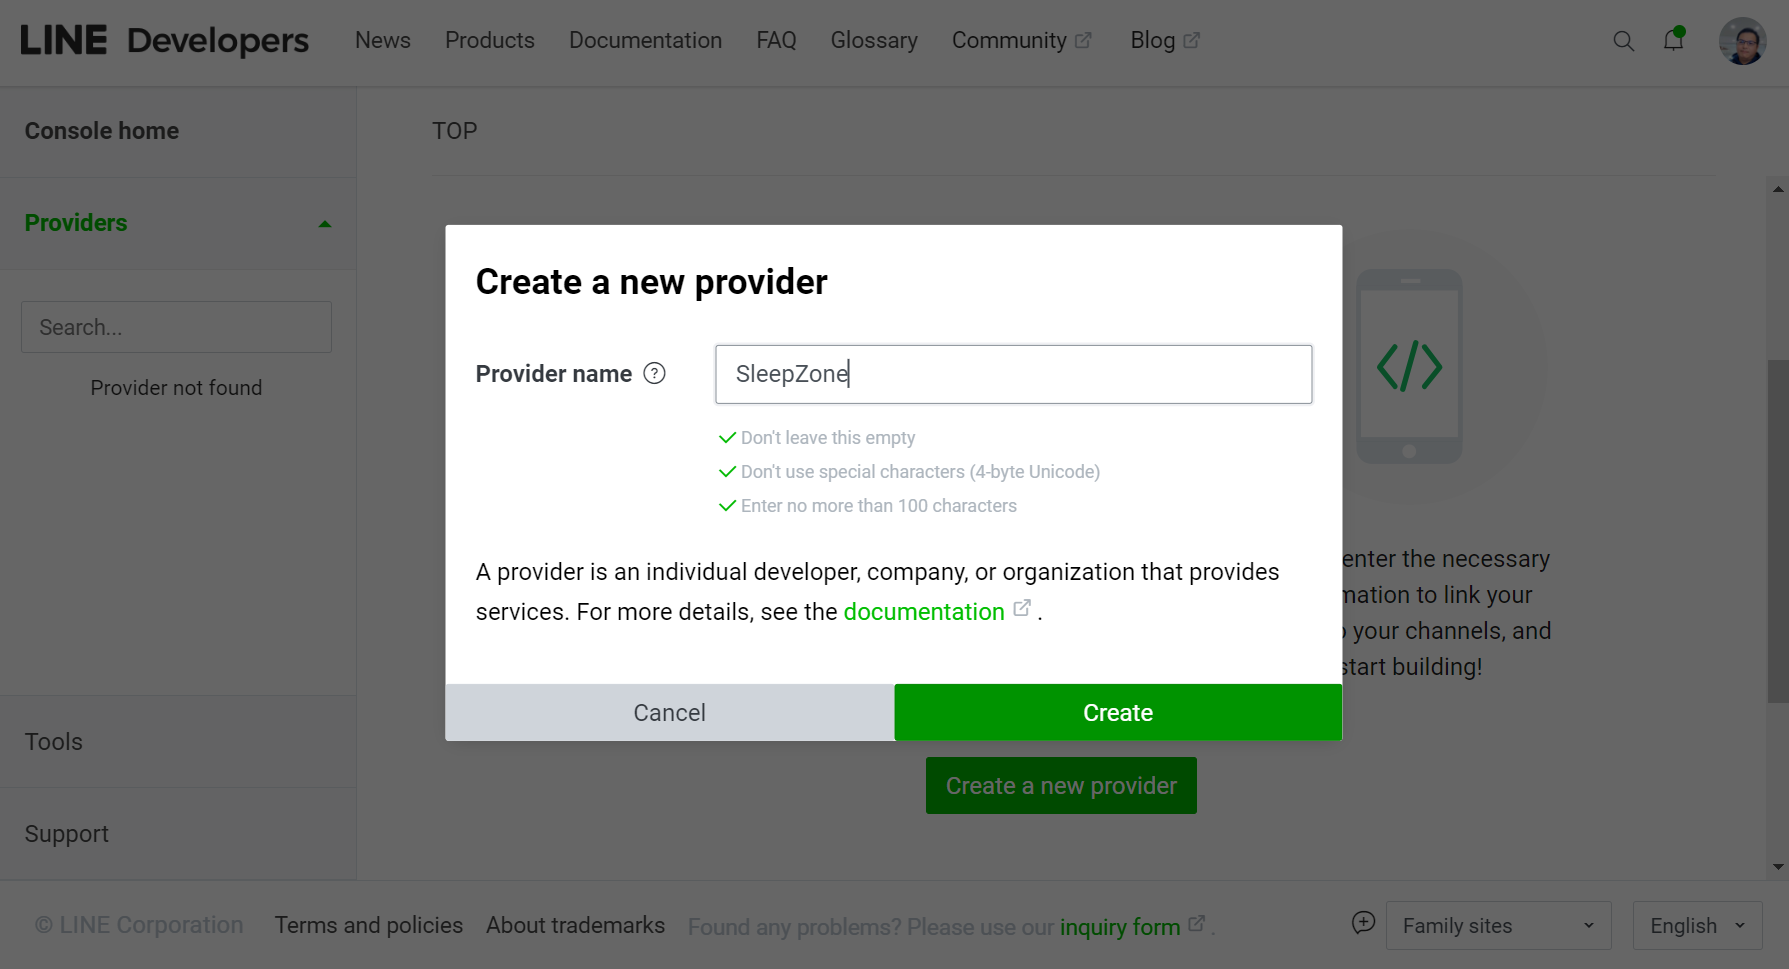
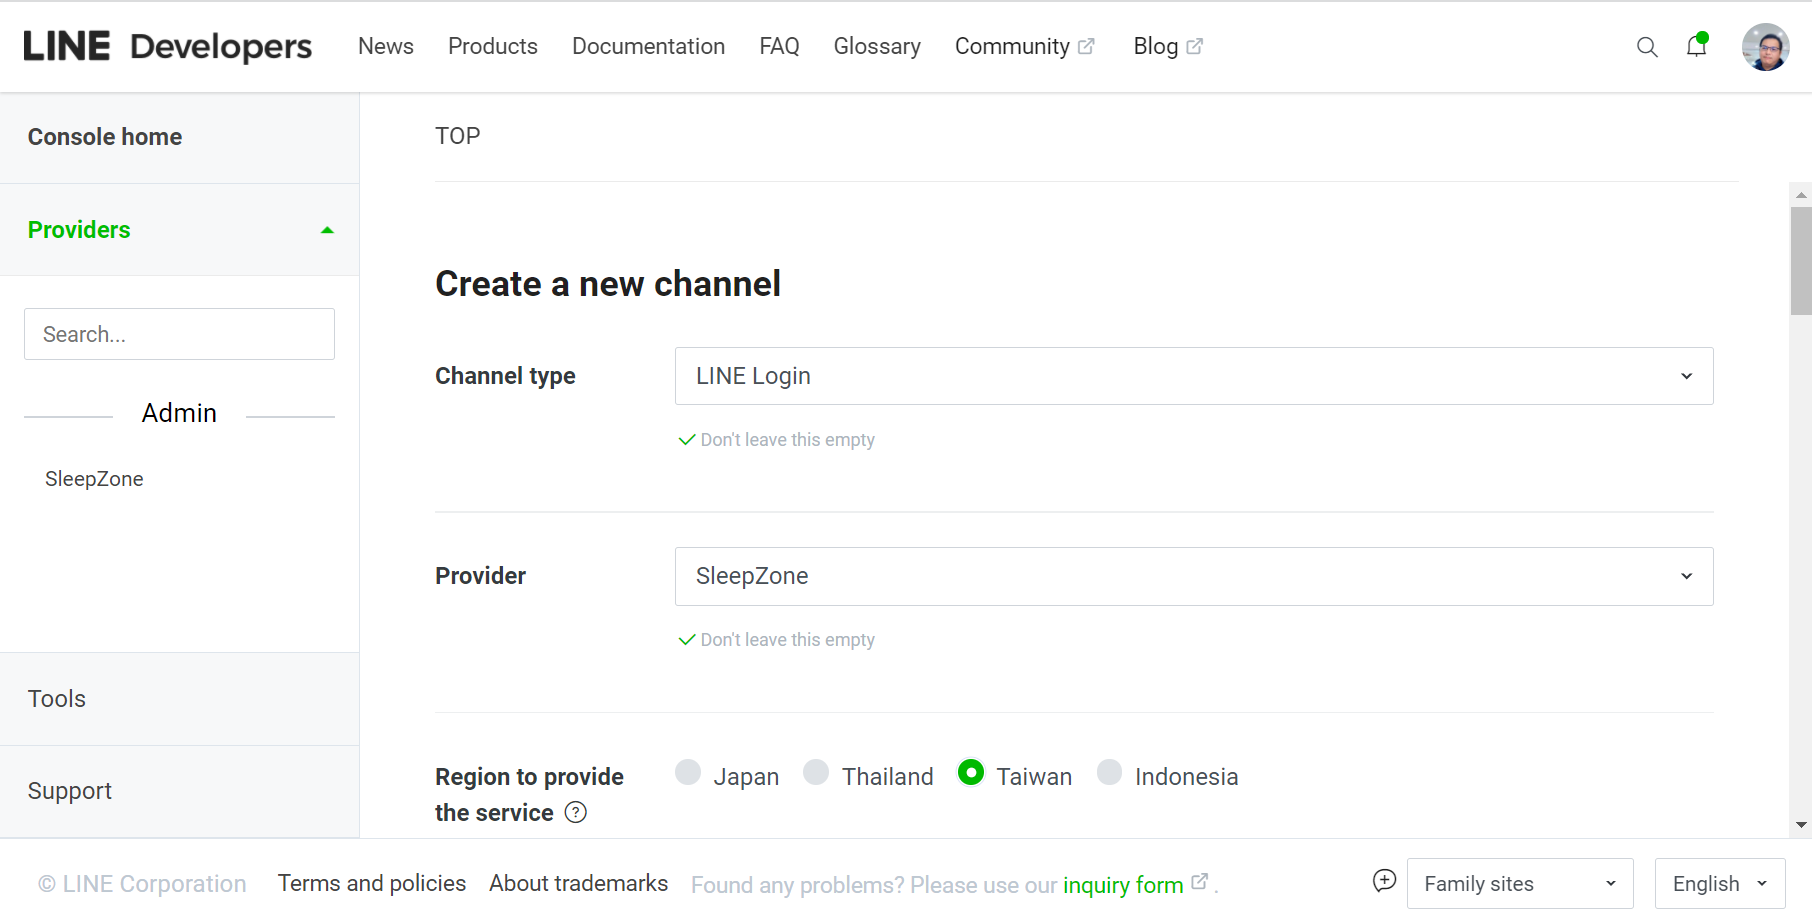
1.註冊並登入Line Developers Console。於首頁,點擊Create New Provider按鈕,依照頁面提示建立一個Provider。
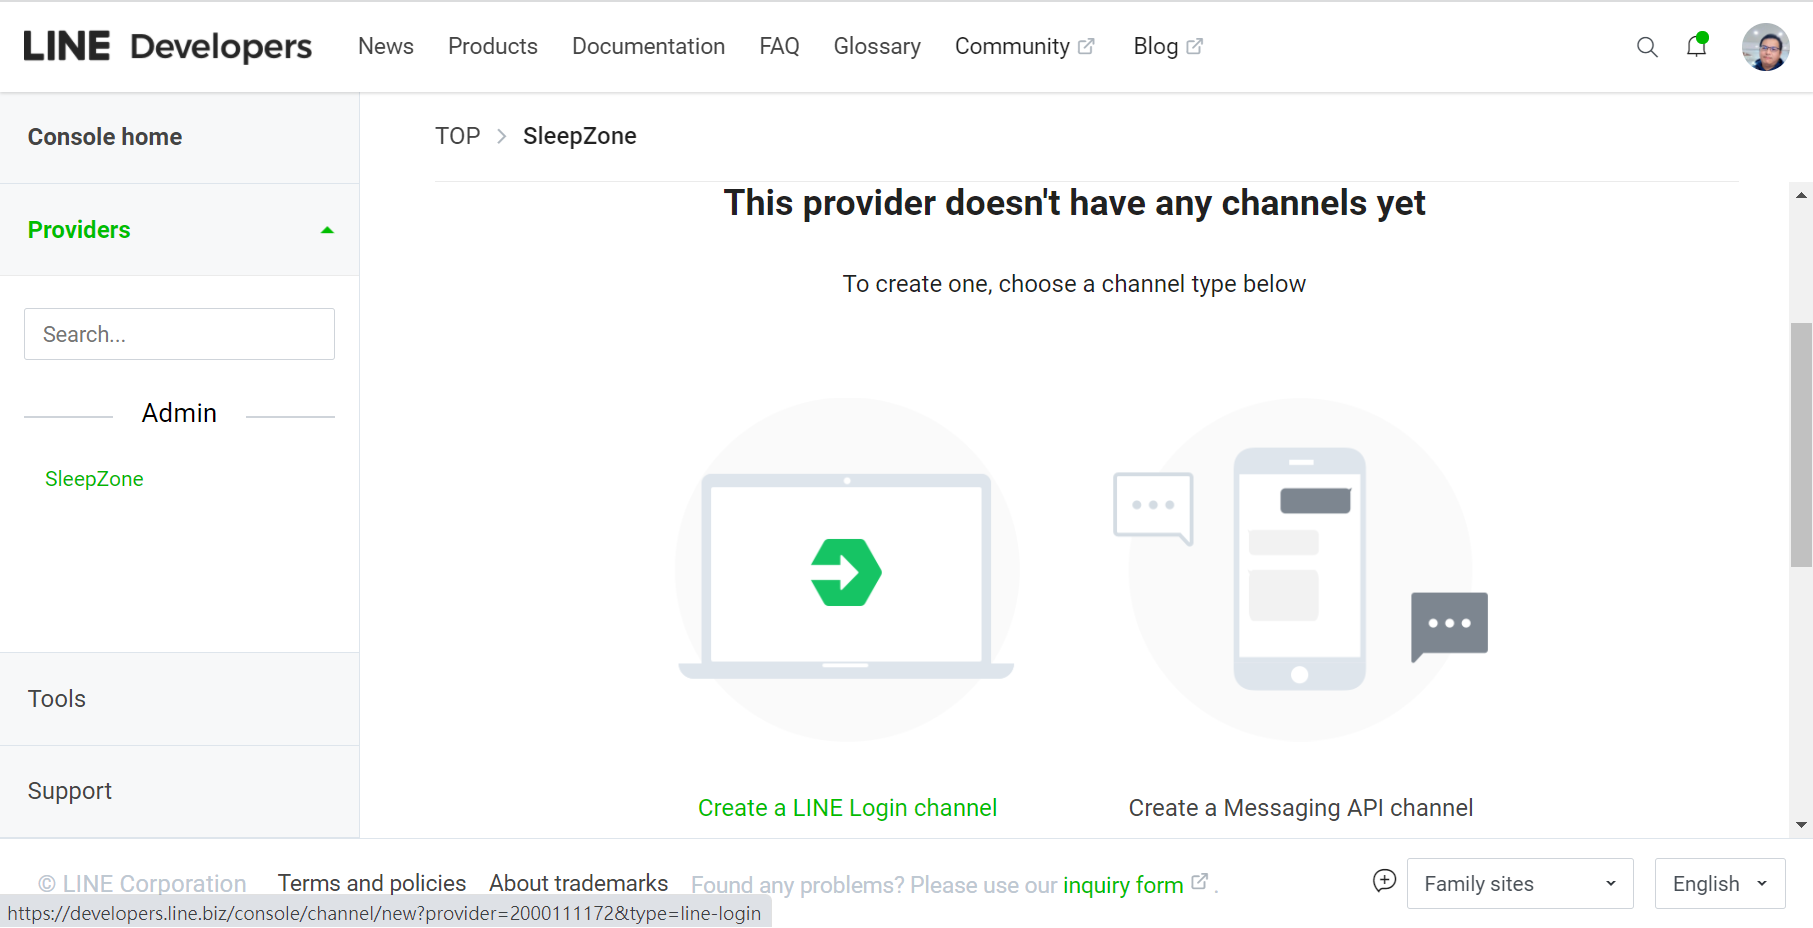
2.於Porvider頁面,點擊Create a LINE Login channel按鈕,依照頁面提示建立一個LINE Login Channel。
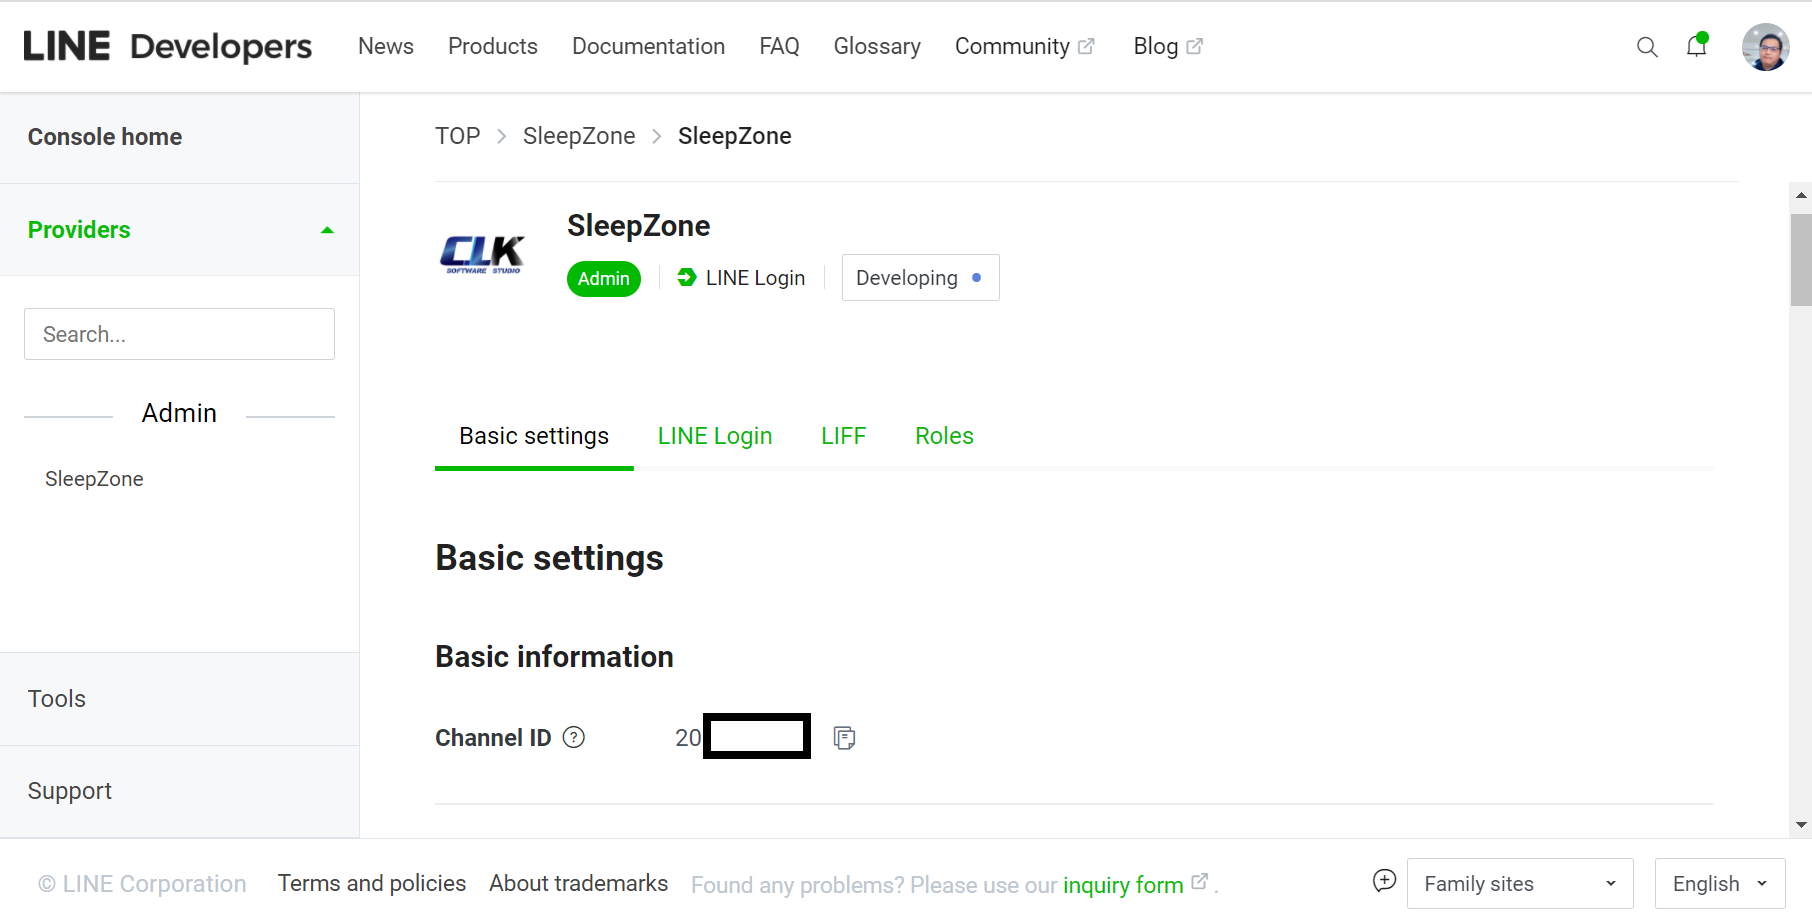
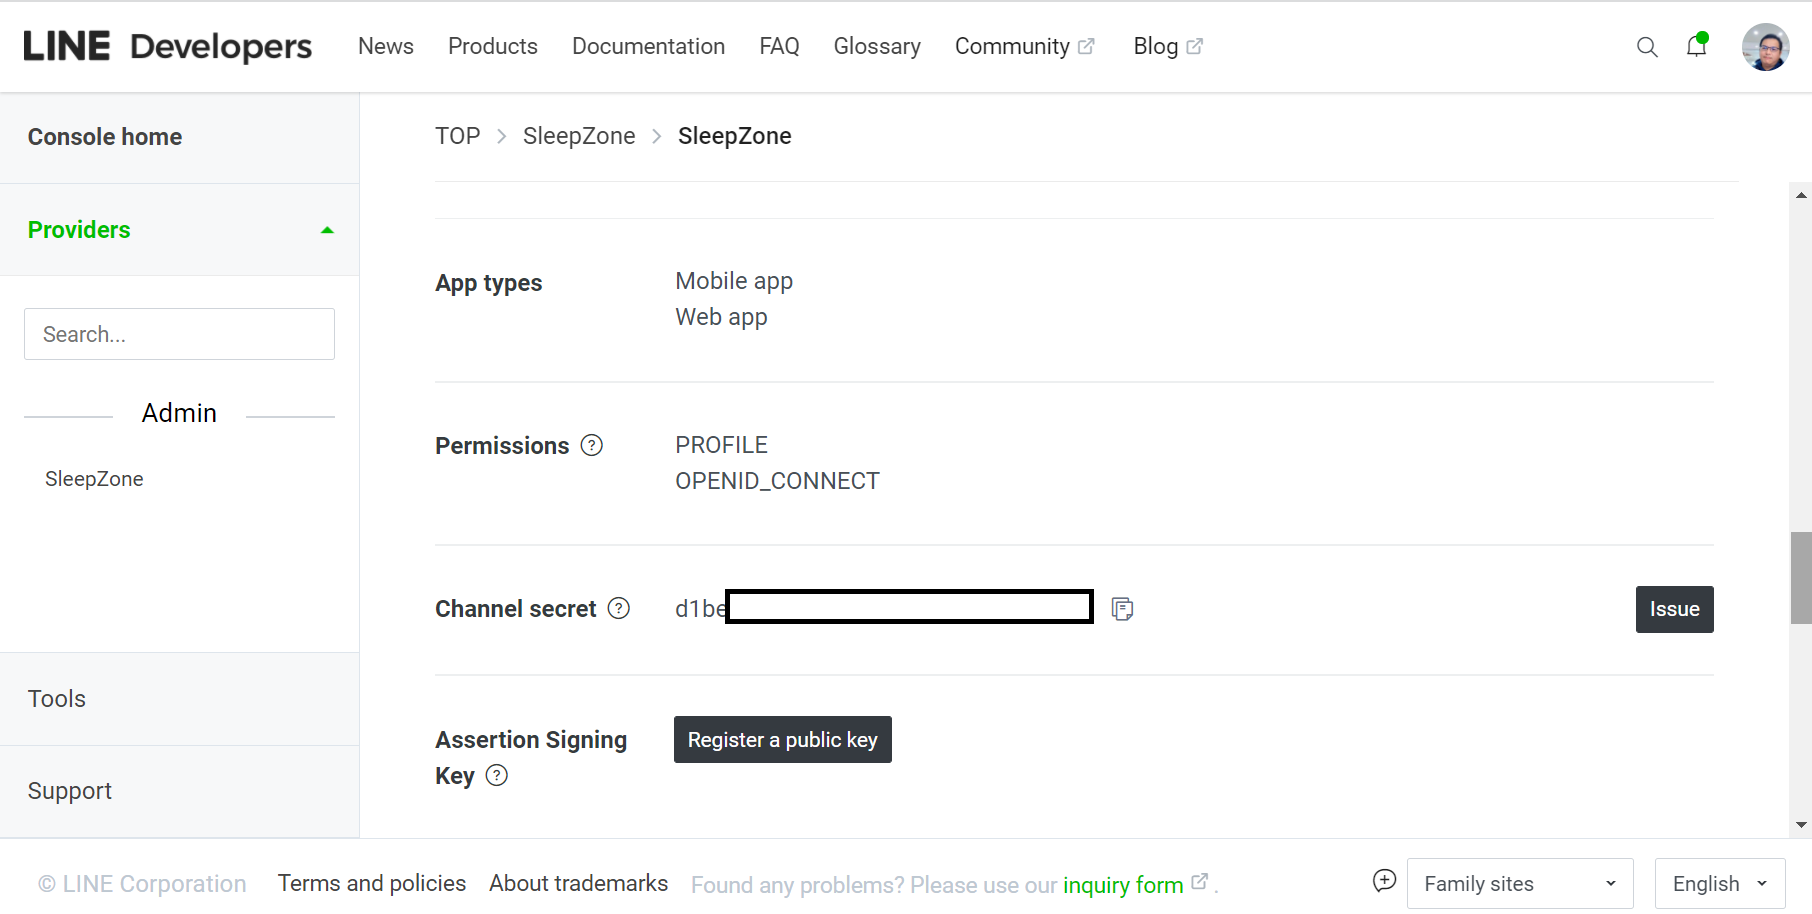
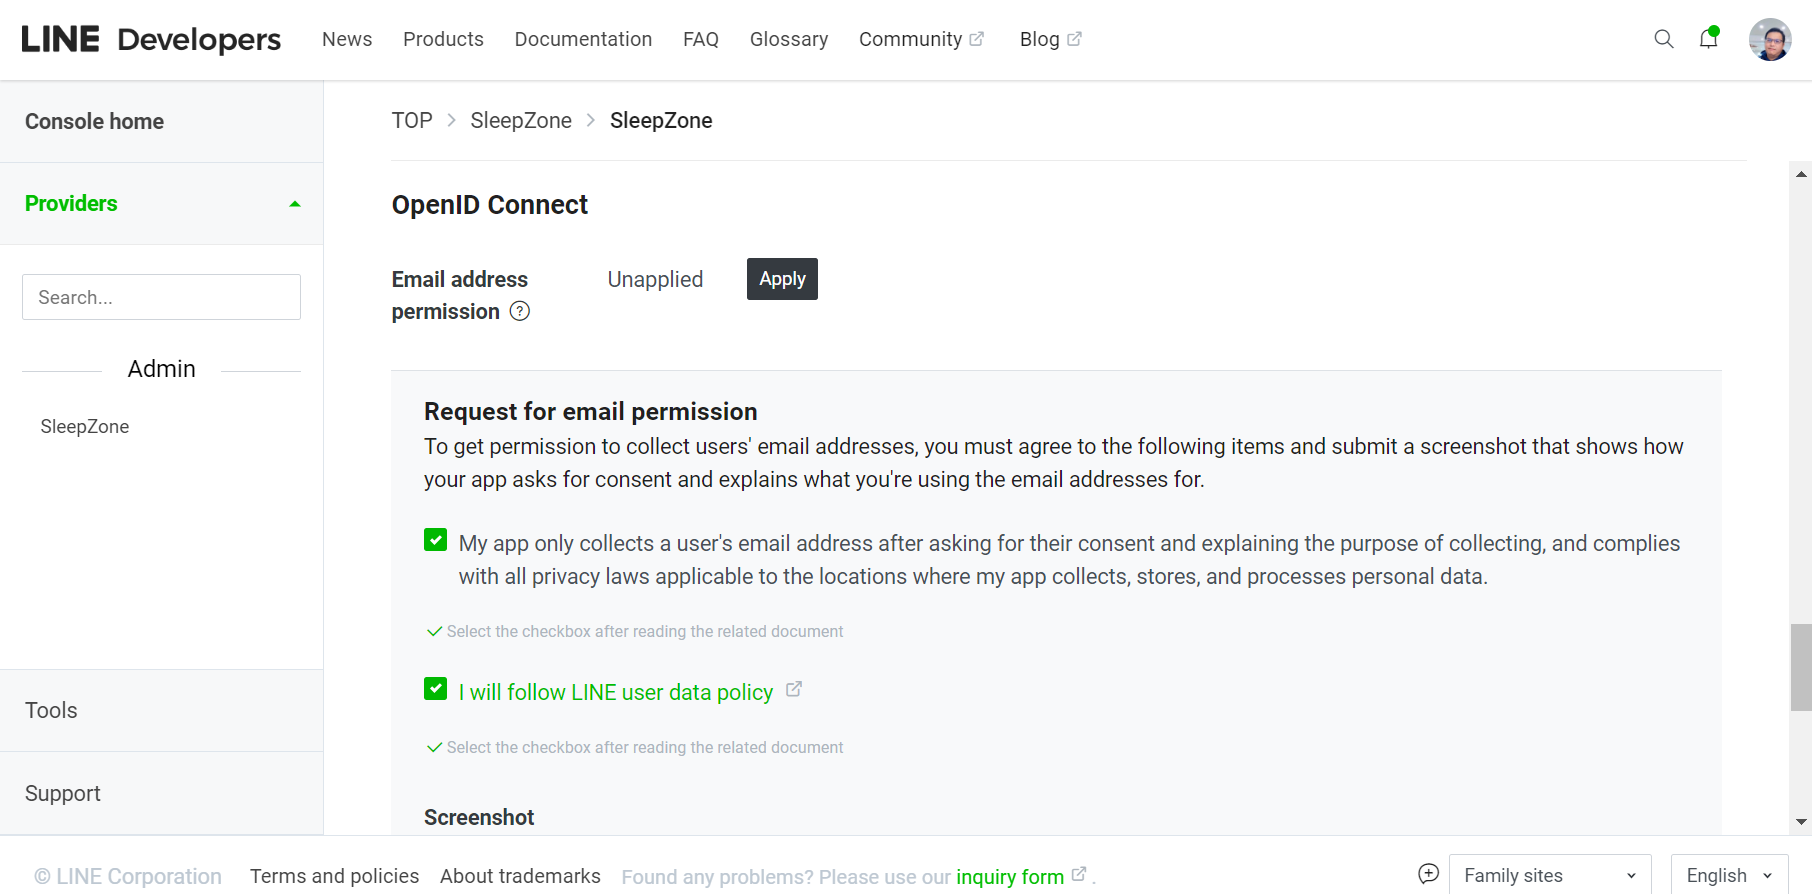
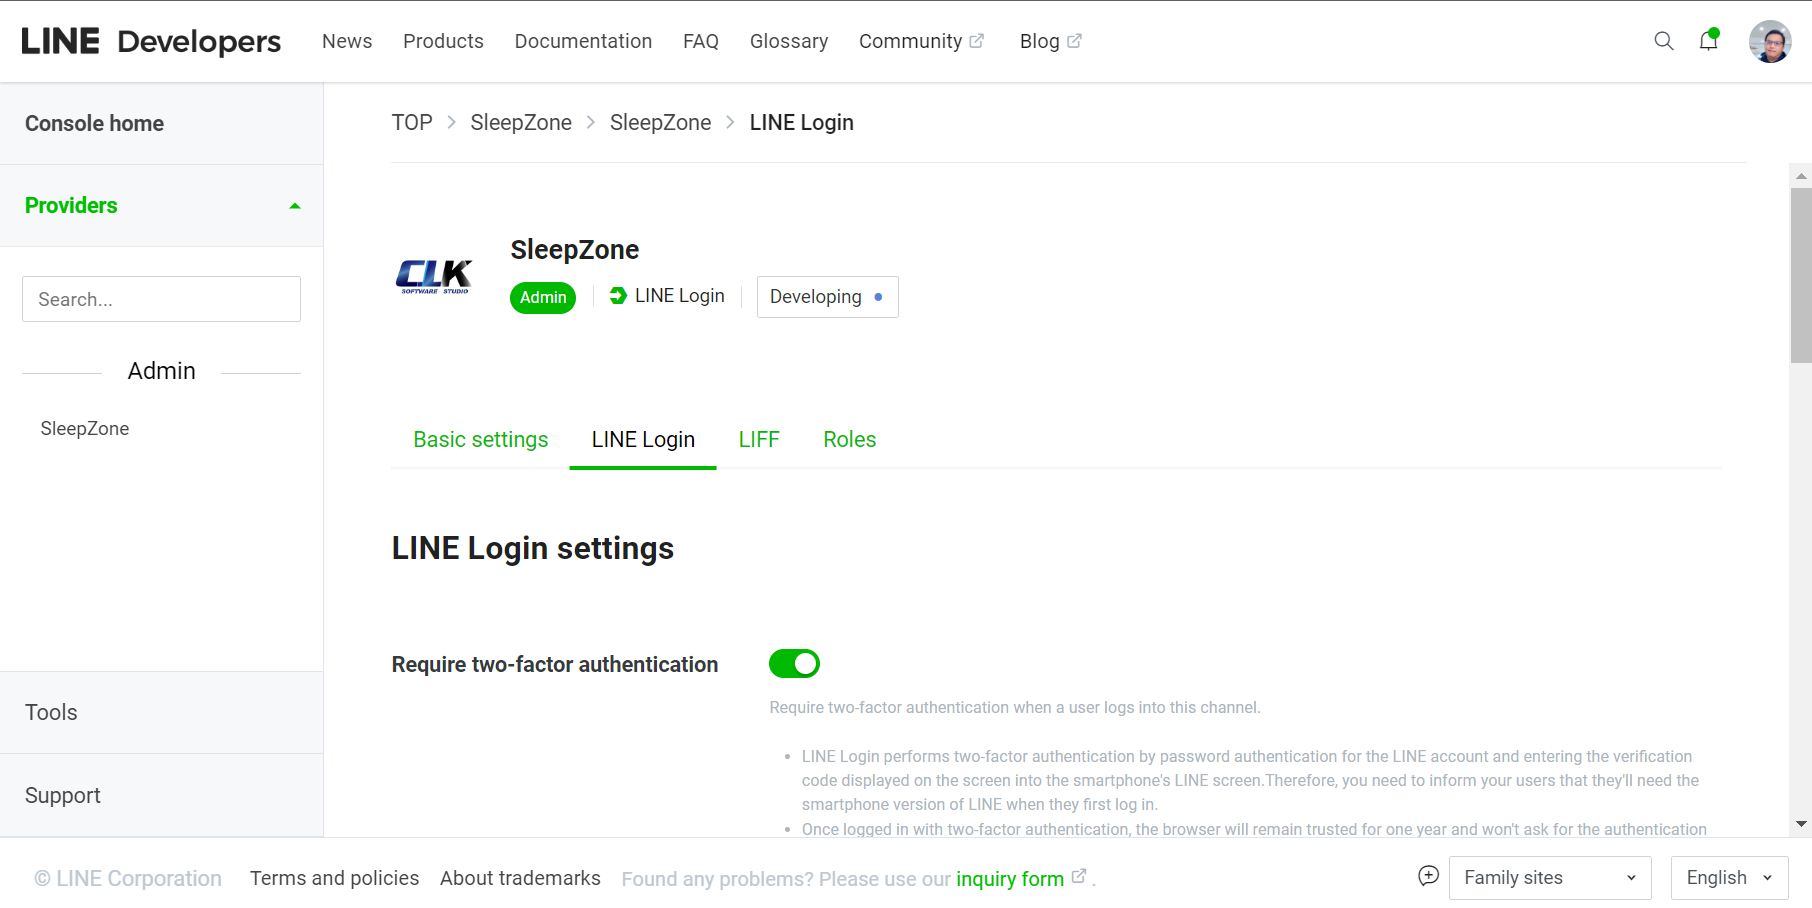
3.於LINE Login Channel頁面,進入Basic settings頁簽,取得「Channel ID」、「Channel Secret」,並開啟Email address permission。
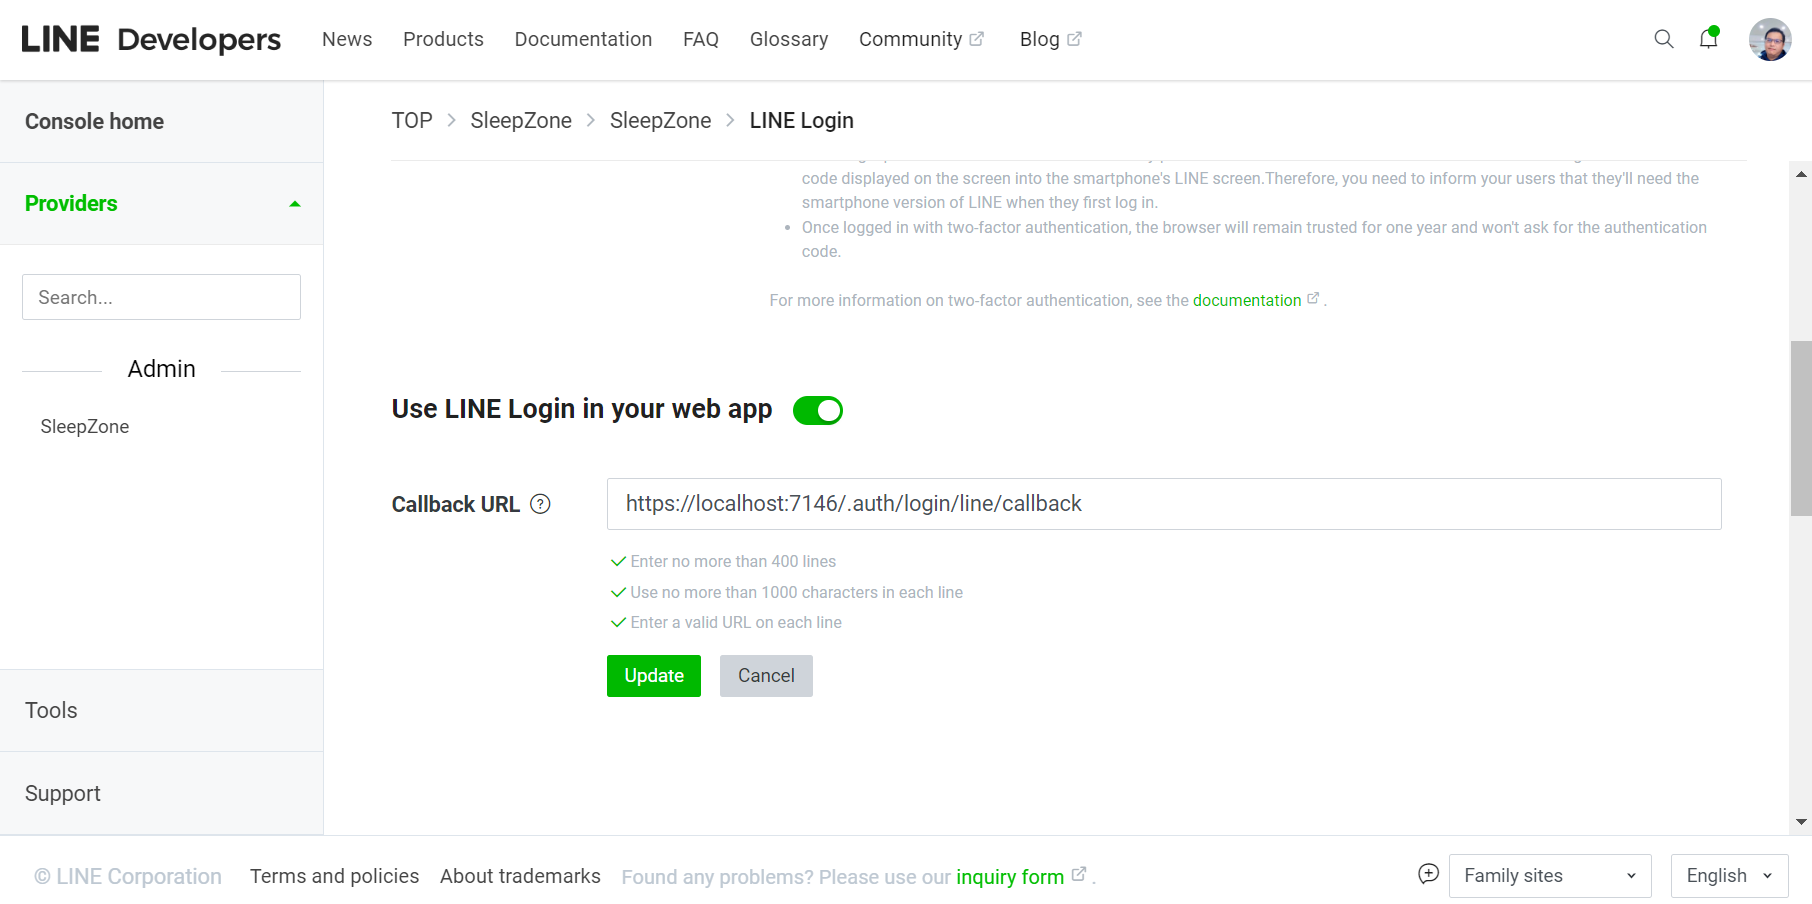
4.同樣於LINE Login Channel頁面,進入LINE Login頁簽,開啟Use LINE Login in your web app,並編輯「Callback URL」。(Callback URL=「程式執行網址」+「/.auth/login/line/callback」)
加入專案
申請服務完成之後,就可以開始建立專案並且加入模組。MDP.AspNetCore.Authentication.Line預設獨立在MDP.Net專案範本外,依照下列操作步驟,即可建立加入MDP.AspNetCore.Authentication.Line的專案。
- 在命令提示字元輸入下列指令,使用MDP.Net專案範本建立專案。
dotnet new install MDP.WebApp
dotnet new MDP.WebApp -n WebApplication1
- 使用Visual Studio開啟專案。在專案裡使用NuGet套件管理員,新增下列NuGet套件。
MDP.AspNetCore.Authentication.Line
設定參數
建立包含MDP.AspNetCore.Authentication.Line的專案之後,就可以透過Config設定,掛載在專案裡使用的Line身分驗證。
// Config設定
{
  "Authentication": {
    "Line": {
      "ClientId": "xxxxx",
      "ClientSecret": "xxxxx"
    }
  }
}

- 命名空間:Authentication
- 掛載的身分驗證模組:Line
- Line身分驗證模組的客戶編號:ClientId="xxxxx"。(xxxxx填入Channel ID)
- Line身分驗證模組的客戶密碼:ClientSecret="xxxxx"。(xxxxx填入Channel Secret)
模組範例
提供Line身分驗證,讓使用者能夠快速登入系統,是開發系統時常見的功能需求。本篇範例協助開發人員使用MDP.AspNetCore.Authentication.Line,逐步完成必要的設計和實作。
- 範例下載:WebApplication1.zip
操作步驟
1.開啟命令提示字元,輸入下列指令。用以安裝MDP.WebApp範本、並且建立一個名為WebApplication1的Web站台。
dotnet new install MDP.WebApp
dotnet new MDP.WebApp -n WebApplication1
2.使用Visual Studio開啟WebApplication1專案,在專案裡用NuGet套件管理員新增下列NuGet套件。
MDP.AspNetCore.Authentication.Line
3.依照模組使用-申請服務的步驟流程,申請Line身分驗證服務,並取得「Channel ID」、「Channel Secret」。

4.於專案內改寫appsettings.json,填入「Channel ID」、「Channel Secret」,用以掛載Line身分驗證。
{
  "Authentication": {
    "Line": {
      "ClientId": "xxxxx",
      "ClientSecret": "xxxxx"
    }
  }
}
5.改寫專案內的Controllers\AccountController.cs、Views\Account\Login.cshtml,提供Login頁面及Line身分驗證功能。
using MDP.AspNetCore.Authentication;
using MDP.AspNetCore.Authentication.Line;
using Microsoft.AspNetCore.Authorization;
using Microsoft.AspNetCore.Mvc;
using System.Threading.Tasks;

namespace WebApplication1
{
    public class AccountController : Controller
    {
        // Methods
        [AllowAnonymous]
        public ActionResult Login()
        {
            // Return
            return this.View();
        }

        [AllowAnonymous]
        public Task<ActionResult> Logout()
        {
            // Return
            return this.LogoutAsync();
        }

        [AllowAnonymous]
        public Task<ActionResult> LoginByLine(string returnUrl = null)
        {
            // Return
            return this.LoginAsync(LineDefaults.AuthenticationScheme, returnUrl);
        }
    }
}
@addTagHelper *, Microsoft.AspNetCore.Mvc.TagHelpers
@{
}
<!DOCTYPE html>
<html>
<head>
<!-- title -->
<title>Login</title>
<!-- meta -->
<meta charset="utf-8" />
</head>
<body>
<!--Title-->
<h2>Login</h2>
<hr />
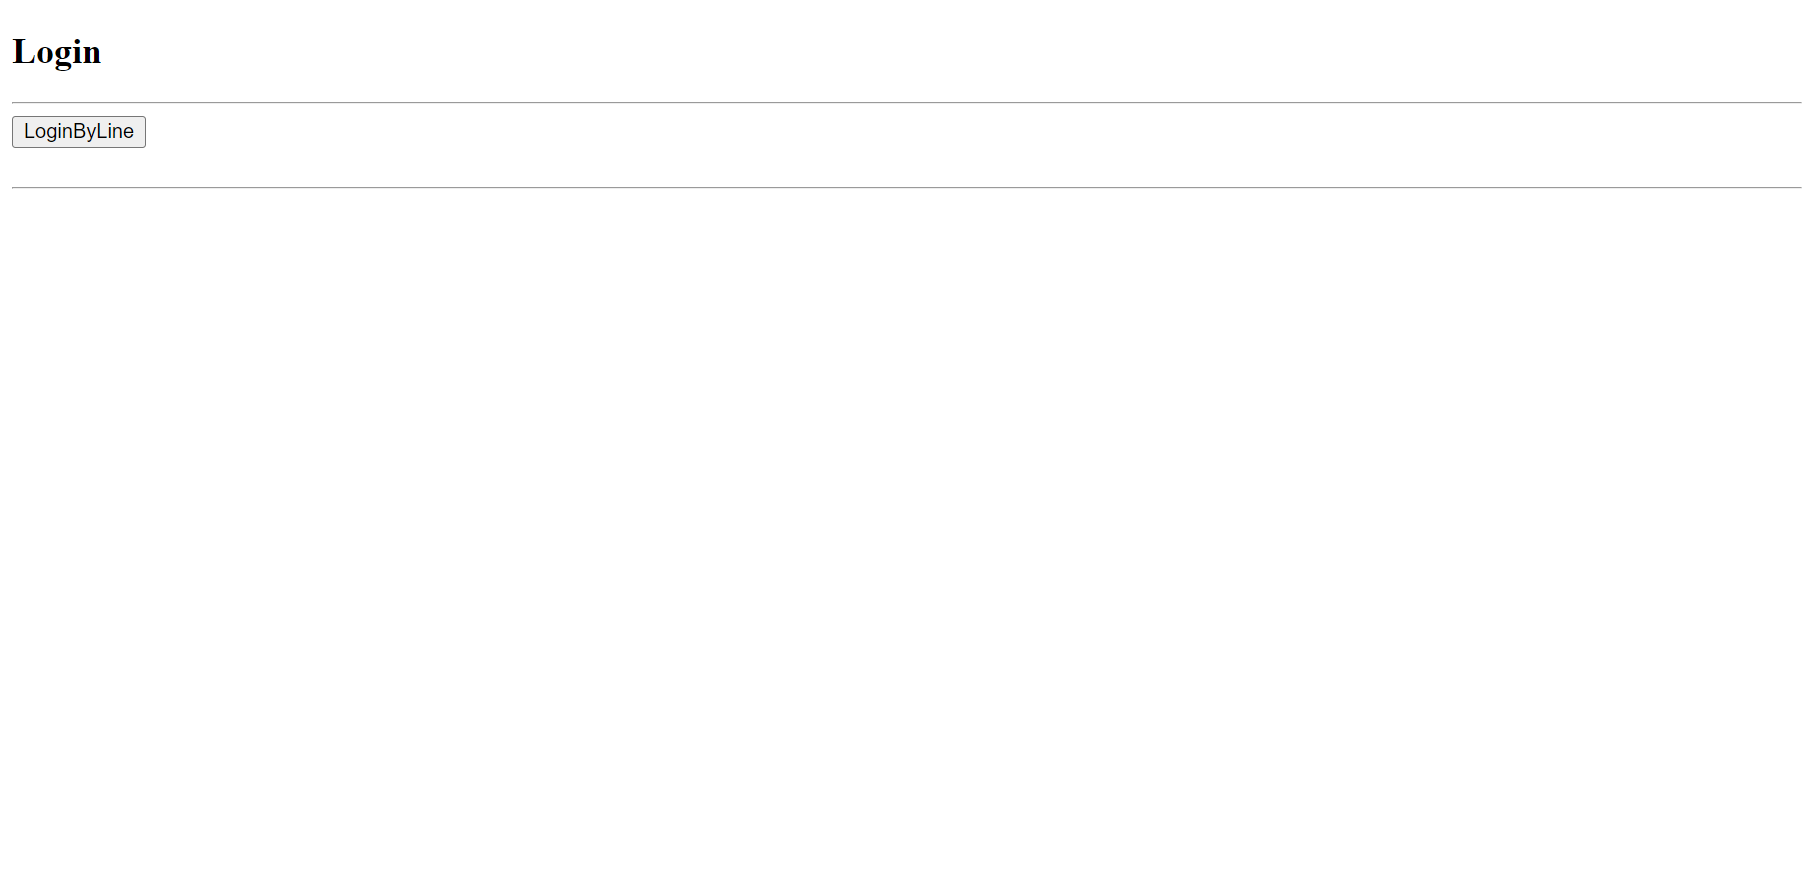
<!--LoginByLine-->
<form asp-controller="Account" asp-action="LoginByLine" asp-route-returnUrl="@Context.Request.Query["ReturnUrl"]" method="post">
<input type="submit" value="LoginByLine" /><br />
<br />
</form>
<hr />
</body>
</html>
6.改寫專案內的Controllers\HomeController.cs、Views\Home\Index.cshtml,提供需登入才能進入的Home頁面,並於該頁面顯示目前登入的身分資料。
using Microsoft.AspNetCore.Authorization;
using Microsoft.AspNetCore.Mvc;

namespace WebApplication1
{
    public class HomeController : Controller
    {
        // Methods
        [Authorize]
        public ActionResult Index()
        {
            // Return
            return this.View();
        }
    }
}
@addTagHelper *, Microsoft.AspNetCore.Mvc.TagHelpers
@using System.Security.Claims
@{
    string GetClaimValue(string claimType)
    {
        return (User?.Identity as ClaimsIdentity)?.FindFirst(claimType)?.Value;
    }
}
<!DOCTYPE html>

<html>
<head>
    <!-- title -->
    <title>Home</title>

    <!-- meta -->
    <meta charset="utf-8" />
</head>
<body>

    <!--Title-->
    <h2>Home</h2>
    <hr />

    <!--Identity-->
    AuthenticationType=@User?.Identity?.AuthenticationType<br />
    UserId=@GetClaimValue(ClaimTypes.NameIdentifier)<br />
    Username=@GetClaimValue(ClaimTypes.Name)<br />
    Mail=@GetClaimValue(ClaimTypes.Email)<br />
    <br />
    <hr />

    <!--Logout-->
    <form asp-controller="Account" asp-action="Logout">
        <input type="submit" value="Logout" /><br />
        <br />
    </form>
    <hr />

</body>
</html>
7.執行專案,於開啟的Browser視窗內,可以看到系統畫面進入到Login頁面。(預設是開啟Home頁面,但是因為還沒登入,所以跳轉到Login頁面)
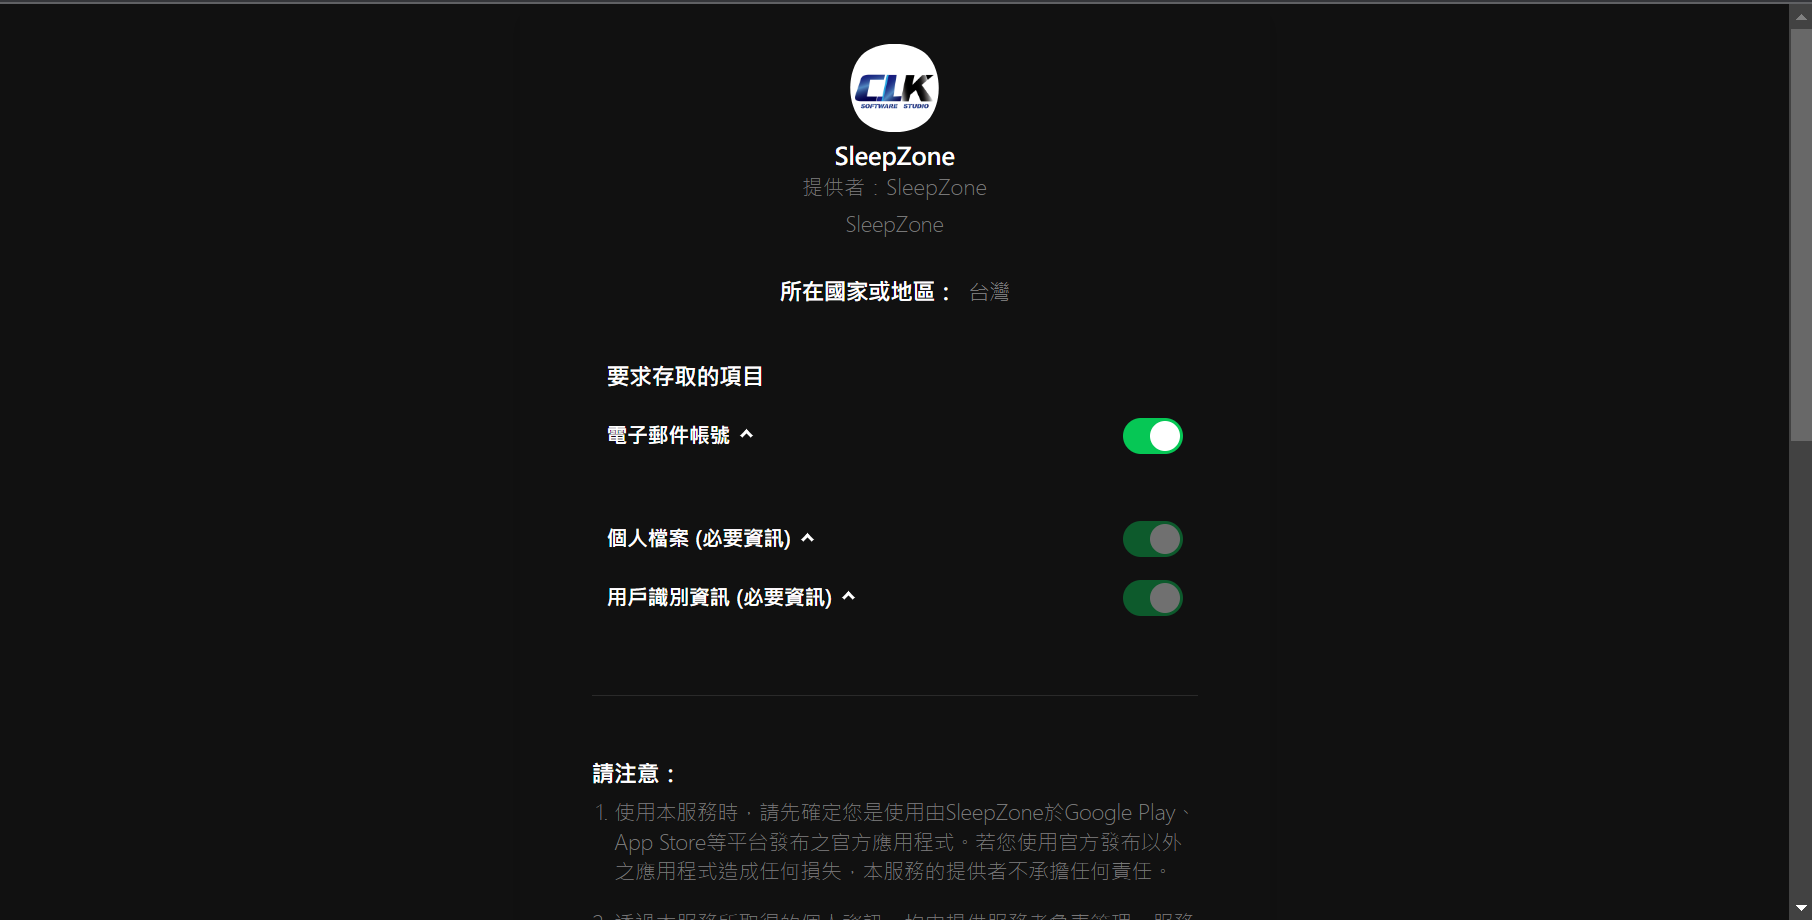
8.於Login頁面,點擊LoginByLine按鈕。Browser視窗會跳轉至Line身分驗證服務的頁面,進行OAuth身分驗證。

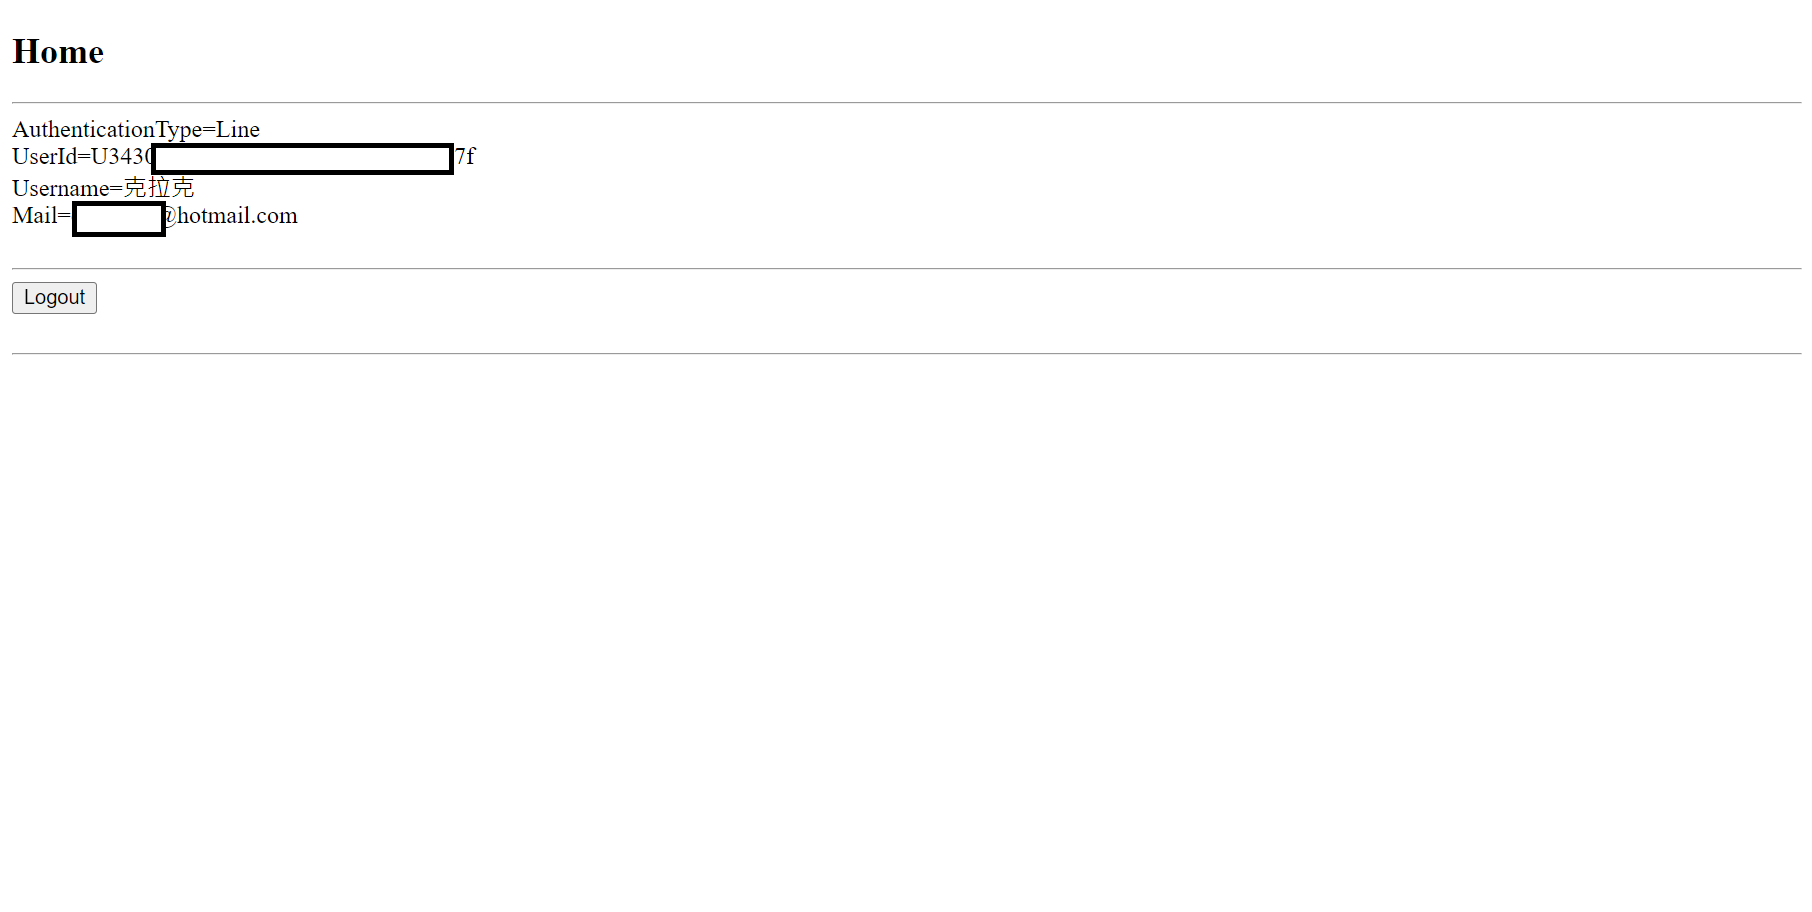
9.於Line身分驗證服務完成身分驗證之後,Browser視窗會跳轉回原系統的Home頁面,並且顯示登入的身分資料。(經由Line身分驗證登入)